

These Autumnal Colored Cavatelli are the Perfect Pasta Project for a Fall Day
|
|
Time to read 5 min
|
|
Time to read 5 min
With the days becoming shorter, fall is finally here. I love the first days of real fall, where the air is crisp and the blue October sky stands out bright against the coloring leaves. My own house in a small side street of a canal in Amsterdam is covered in voluptuous ivy that is slowly but surely turning yellow and red.
Noticing these seasonal changes around me inspires my pasta-making heavily. I love switching over to fall ingredients with mushrooms and pumpkin featuring in most of my recipe ideas. Another way to incorporate the vibe of the season is by working with colors. That’s how these “Fall Day Cavatelli” were inspired.
Cavatelli are a simple pasta shape from southern Italy. When I say simple, like most things in Italian cuisine that doesn’t translate to being uninteresting. Rather, they are wonderfully basic in their ingredients and method of making, which offers the perfect base for creating delightful and delicious dishes with little preparation and effort. In this recipe, I’ll lay out the fundamentals of making cavatelli, complete with a colorful twist to give a little nod to the season of red, orange, and gold leaves. Note: If you read this at any other time you can apply the same methodology to create your own color palette. The measurements will remain the same even if the ingredient adding the color changes.
But before we move on to the recipe, let’s take a bit of a closer look at cavatelli. Like many hand-shaped pastas, this one originates in Southern Italy and is most often associated with the regions of Puglia, Campania, Calabria, and Sicily. It’s one of the pasta shapes that I’ve come across with the largest family of closely related pasta shapes. You can find similar shapes called gnocchetti sardi (the visual appearance makes the reference clear) or malloreddus, with the main differences being variations in the dough and the size.
The dough I share below is one that I’ve come across most often is a very uncomplicated affair: semolina rimacinata and lukewarm water. Some might add salt as well (and if that is how it works best for you, go right ahead!) but I prefer the elasticity without it.
And as we’re working with colors here, you will find some additional ingredients added to my recipe as well. While I often work with vegetable purees for color (like this great recipe for beetroot busiate!) I opted for powdered veggies and spices here. The main reason is that this way I have full control over the texture of the dough – an element that can be a bit unpredictable when working with purees.
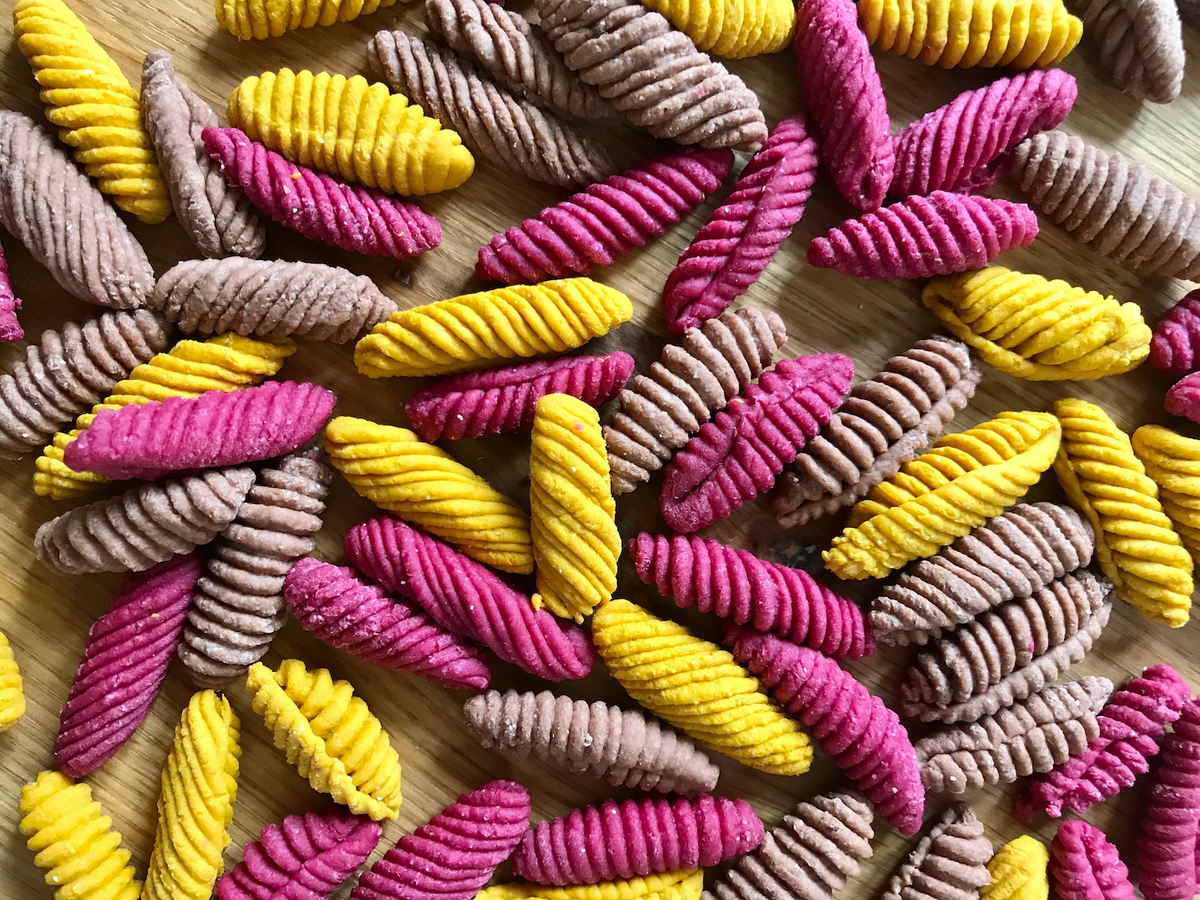
The great thing about cavatelli is not only the simplicity of ingredients but also the simplicity of tools. You don’t even need a pasta machine , and for the final shaping, you have tons of options. The two most common options would be to work with either a gnocchi board (like this gorgeous olive wood piece ) or a pettine (in case you’ve never heard that name before, check out this article with background on it). For my fall-inspired fall-colored cavatelli I felt the natural and slightly irregular look I could achieve with a pettine would be the perfect finishing touch, and by angling the cavatelli in different directions, I also created quite some variety.
I’ll be serving these up with some classic brown butter and heaps of parmesan but if you feel like getting out the chunky sauces already that’d be a great choice as well. I hope you enjoy them!

2 hours
5 minutes
4
300 grams semolina flour (preferably semolina rimacinata ), divided into three 100-gram amounts
5 grams dried beetroot powder
5 grams ground turmeric
5 grams unsweetened cocoa powder
165 grams lukewarm water, divided into three (55-gram) amounts
You will make three separate pasta doughs. Start by placing 100 grams of semolina flour and the turmeric powder into a metal or glass bowl. (Note: Usually, I advise wooden equipment for pasta dough but choose a different material here as turmeric and beetroot might stain your wood). Mix the dry ingredients well with a fork and then create a little well in the center.
Add 55 grams of lukewarm water to the center and start whisking with your fork to incorporate some of the dry ingredients. The water will quickly thicken up. When you approach a custard-like consistency, start working the remaining dry ingredients in by scooping them over the center with your fingertips and pressing down. Repeat from all angles until there’s no loose semolina flour left. Now turn the dough onto a cutting board (again, being mindful of potential staining when you chose which cutting board to use) and start kneading the dough, for at least five, preferably 10 minutes. If you feel your dough is too dry or too wet, add a spritz of water or a dusting of flour, but try not to do so too early in the kneading process.
Wrap your dough in a lightly moistened kitchen towel and let it rest for at least 30 minutes.
Repeat all steps for the two remaining doughs, beetroot, and cocoa. Nota bene: Work working from lightest to darkest color avoids any discoloration if you’re using the same tools.
Cut each of your three pieces of dough into quarters, then roll each quarter into a long snake with your hands, about as thick as your thumb. Using a dough scraper or butter knife, slice each “snake” into square-ish pillows.
One by one, place these pillows on your pettine or gnocchi board . Use your dough scraper or butter knife to shape the cavatelli: by applying pressure and pulling the dough scraper towards you, the dough will curl around itself. Place the finished cavatelli on a large plate or board, covered with a tea towel to avoid the pasta sticking to the plate.
To cook the pasta, bring a large pot of water to the boil, then add a generous amount of salt. Submerge the cavatelli and let them boil for 3-5 minutes. The exact boiling time will depend on the exact size of your pasta. After 3 minutes, you can take out one piece and cut through it: if you still see lighter colored, dry-looking dough in the middle, they will need a bit longer. You can of course also assess by tasting the pasta.

