

8 Tips for Making Better Stuffed Pasta
|
|
Time to read 5 min
Summer Sale Up to 25% off Shop Now
|
|
Time to read 5 min
Stuffed pasta not turning out the way you want?
Anyone who has tried to make stuffed pasta before knows that it can be tricky. While I don’t want to discourage anyone from trying their hand at tortellini or agnolotti, there are many things that can go wrong filled pasta shapes. Some of the most common questions I get are:
What do I do if the pasta dough has dried out and won’t seal?
How do I prevent my ravioli from falling apart in the water?
Why is my filling coming out when I seal my ravioli?
But fear not! I’ve put together a list of my favorite tips for making stuffed pasta. Pair these stuffed pasta-making tricks with a little bit of practice and determination and you’ll be on your way to making better ravioli in no time!
To make filled pasta, you have to be able to bend and shape the dough easily. This is where hydration comes into play. For semolina pasta, hydration simply means water, but when it comes to fresh egg pasta, hydration means eggs, primarily from the egg whites.
Bear with us for a moment while we get a little scientific. When you add eggs to pasta dough, you’re doing two things: the yolks add color, flavor, and nutrients. They’re what make the pasta dough yellow and give it a rich, eggy taste. On the other hand, egg whites, which are 90% water, add moisture. They help your pasta dough become more pliable.
Some fresh pastas, like the Piemontese tajarin, call for an all egg-yolk dough. This is wonderful when you want to create an extra rich pasta that doesn’t need a whole lot of shaping. But for stuffed pasta shapes, we need enough hydration to bend and fold the dough, and ultimately seal it together. If there isn’t enough moisture, it will dry out quickly and crack.
For ravioli and filled shapes, I like to stick to this basic dough recipe: 360 grams (about 2 ¾ cups) of 00 flour and 4 eggs, which serves four.
Keep in mind that in order for the dough to properly hydrate you should knead the dough long enough (10-15 minutes at least) and let it rest, covered in plastic wrap, for at least 30 minutes.
When making regular shapes like tagliatelle and pappardelle, it’s common to sprinkle on a lot of flour over the top of the dough to keep it from sticking together or to your countertop. But with filled pasta, you don’t want to sprinkle flour on your pasta sheet or it will dry out and you won’t be able to seal the edges of your ravioli.
Instead, use a little bit of flour–only if you must–on the bottom of your pasta sheet to keep it from sticking to your surface. Don’t sprinkle any flour on top where you will be sealing the edges together.
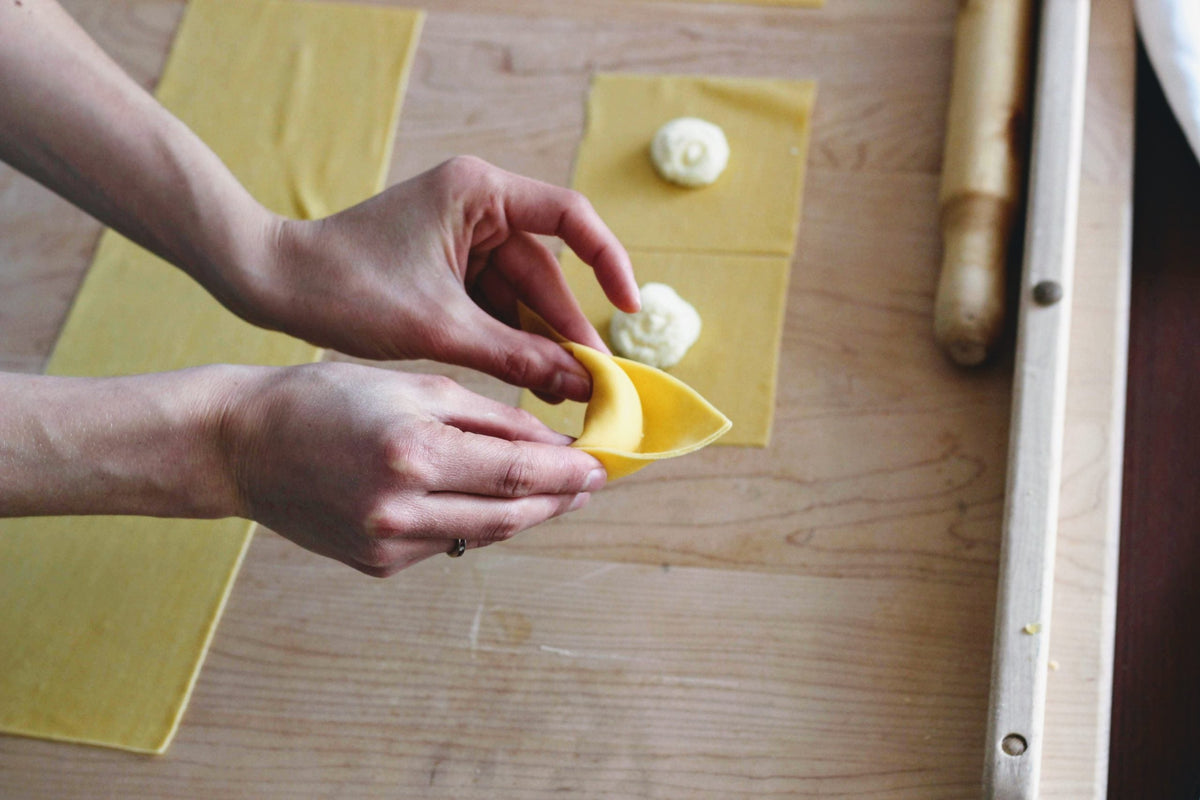
Making stuffed pasta is a little bit like taking a geometry or origami class. It’s essential to cut out perfect and even squares, rectangles, and circles in order to have a beautiful pasta shape at the end.
For example, when making tortellini, you start with a square (usually about 1 x 1 inches). Then you fold it over into a triangle and wrap the two ends around your finger before sealing them together. If the square you’re starting with isn’t a perfect square, your tortellini are going to look a little wonky, with some edges being longer than others.
To help achieve these perfect shapes are your starting points, you can use pasta tools to do the cutting to you. An adjustable wheel cutter, for example, can cut out multiple squares simultaneously with just a few short movements. A round ravioli stamp can give you a perfect circle for making cappelletti almost instantaneously.
One of the challenges to making stuffed pasta is that your pasta sheets can dry out quickly, becoming unsealable. While you’re busy piping the filling on one end of your pasta sheet, the other end is sitting there exposed to air, drying out by the second. If the dough becomes too try, you might find that it cracks or the edges refuse to seal together.
In order to prevent this, it’s important to work in batches, move quickly, and keep any dough that you’re not working on fully covered in plastic wrap.
Even the swiftest pasta shapers may realize that their dough has dried out before they get a chance to seal it. If that happens, use a fine mist spray bottle to spritz water over the top of your pasta sheet. Point your bottle up into the air – not directly at your sheet of pasta – and spray, allowing the droplets to fall gently and evenly onto your dough, without dousing it like a hose. Be careful not to get huge droplets on it or to spray too much, or it will become gooey. You just want it to provide a thin layer of moisture so that you can seal the edges together.
When it comes to stuffed pasta, don’t be afraid to fill it up! You want your tortelloni or cappelletti to be plump and “tight,” otherwise you’ll end up with too much air in the middle. This air can cause the whole thing to burst when boiling. Plus, a plump pasta is a good pasta. (I’d never thought I’d say this, but it’s like botox.)
When sealing the pasta, it’s essential that you remove any air bubbles from the center before closing it up. To do this, use your fingers to feel out where the filling ends and the unfilled pasta edges begin. Seal the pasta around the filling first, as close as you can to the filling itself, then work your fingers to the raw edge of the shape after that. In other words, seal from the inside out.
If you notice your stuffed pasta is exploding or breaking while boiling, it may be that you’re boiling it too vigorously. Stuffed pasta shapes are delicate and therefore require delicate cooking.
Bring your water to a gentle boil (just past simmering), add salt, and then gently drop the stuffed pasta in the water. After about 3 to 5 minutes, use a slotted spoon to remove it and add it to your sauce. Make sure the spoon you’re using doesn’t have sharp edges and that when you add it to the sauce, it’s on low heat.
Ready to try your hand at making stuffed pasta? Explore all of our stuffed pasta recipes.


