
Nonna Rita’s Chocolate Cookies
Recipe and photos by Emma Givens as part of her Calabrese Cooking with Nonna series
When my Nonna Rita moved into our family home, a few years after my nonno passed away, we built her a completely separate kitchen. Even though it was a bungalow.
I have to admit; I was skeptical at first. But every Italian nonna needs a kitchen to call her own!
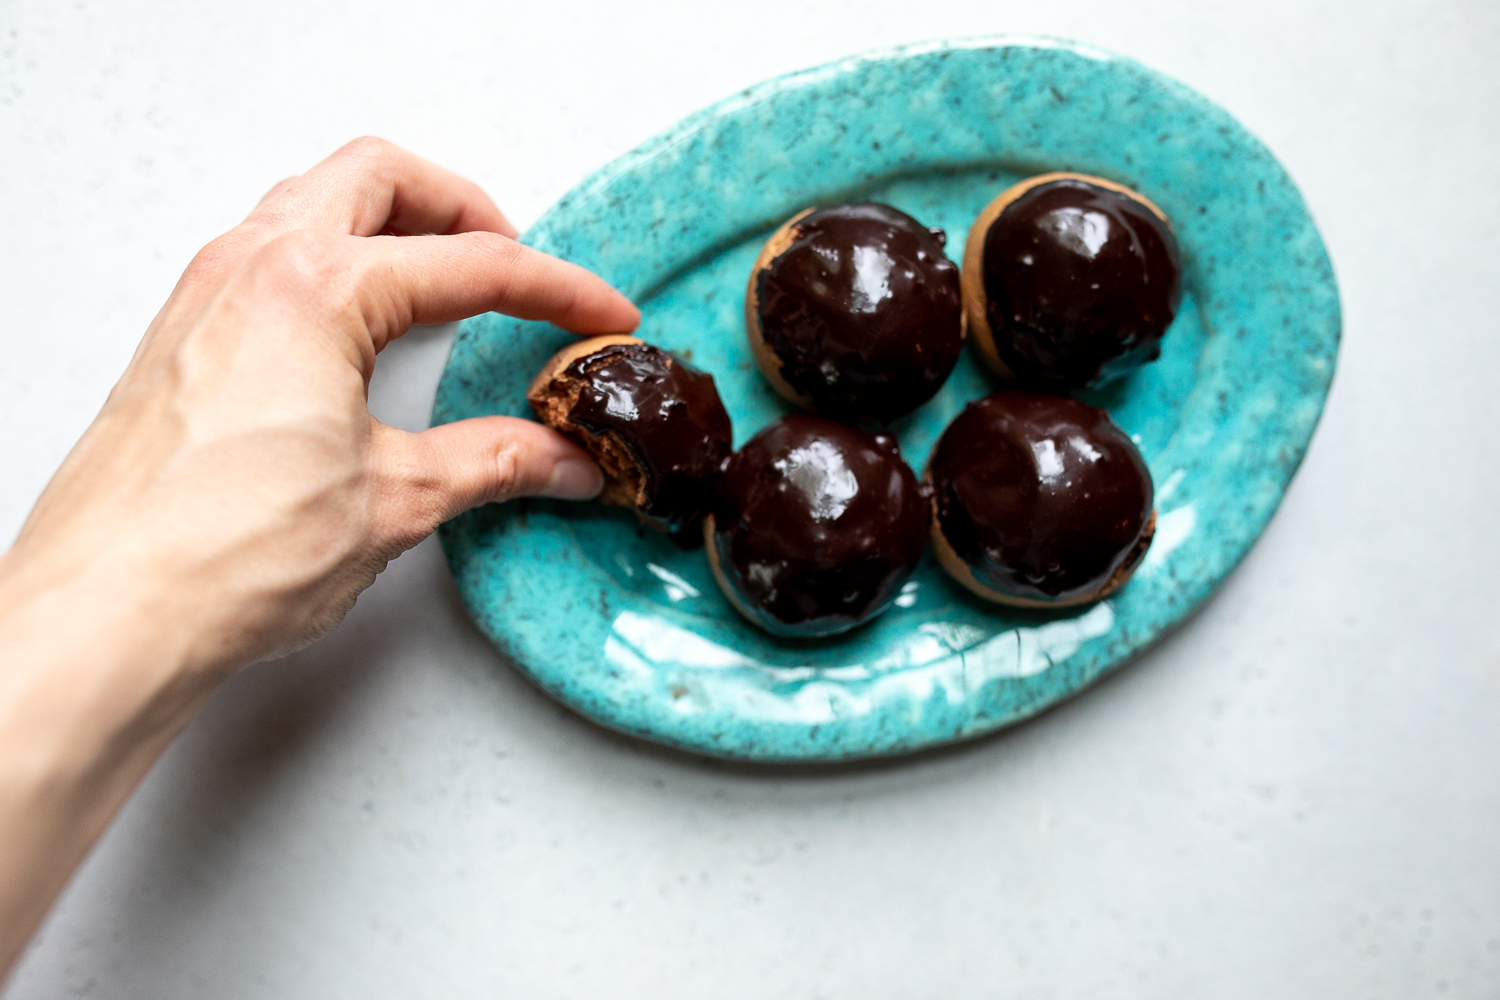
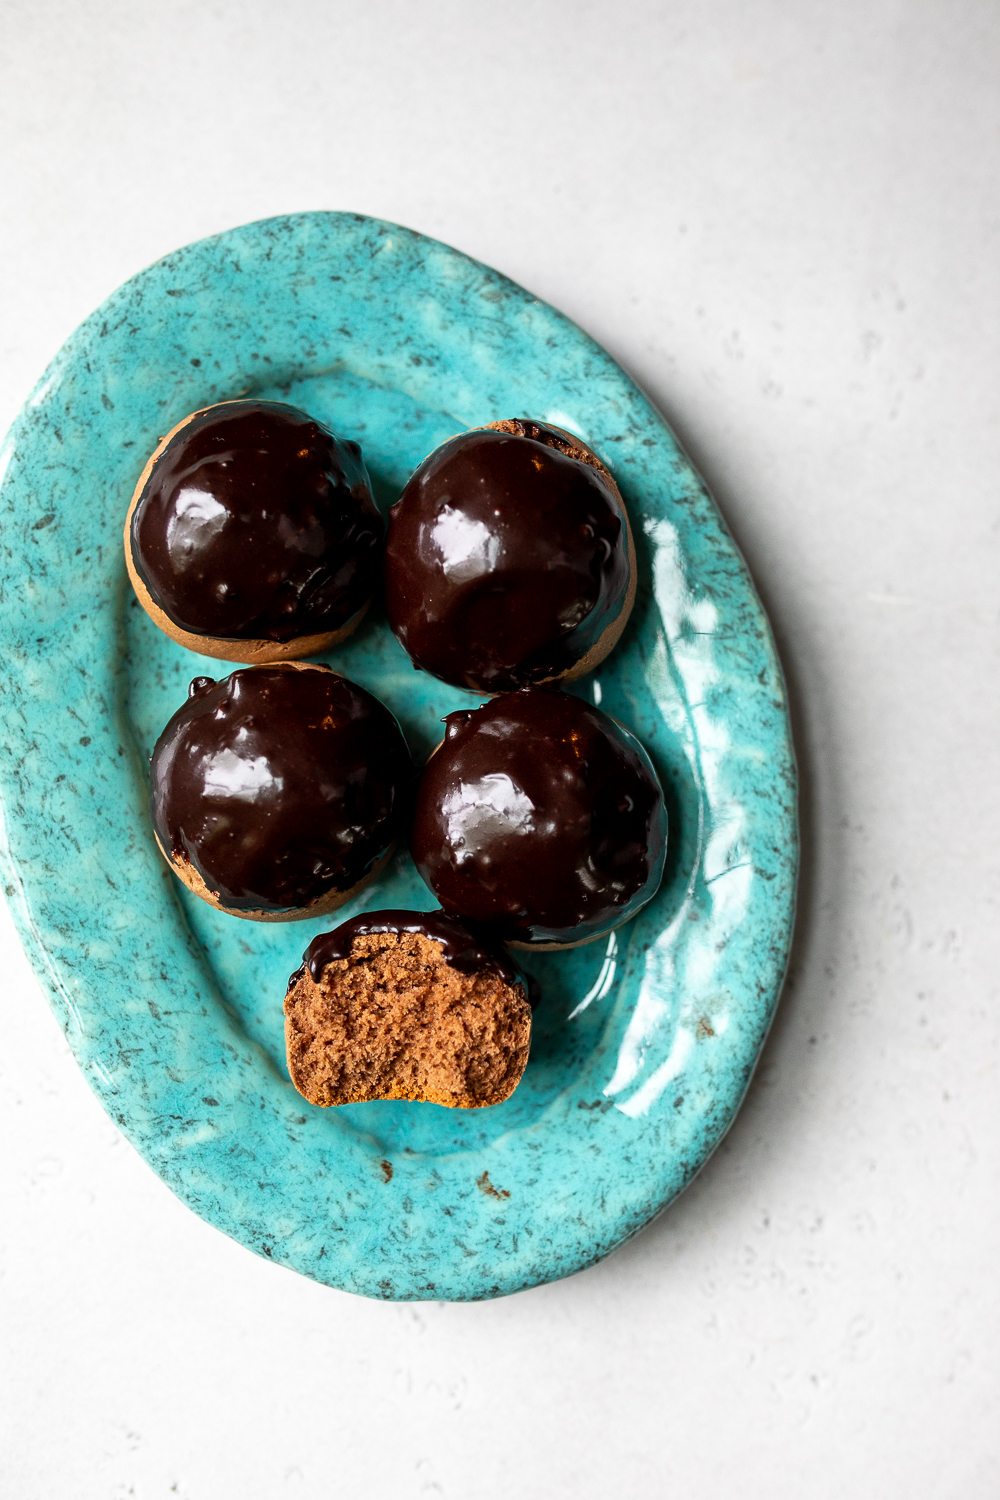
While we were at work or school, she’d spend long days making recipes like these chocolate cookies. The key to keeping them soft was to take them out of the oven before the timer hit 20 minutes. And they were perfectly sweet with a thick layer of chocolate icing that my nonna carefully spread across every available curve.
It gave her so much joy to bake sweets that we’d get excited about — and what’s more exciting than chocolate?
Mom would often get home while my nonna was still tidying up and get first dibs on the cookies. Happy to have company, my nonna would boil a small pot of water on the stove so she could treat herself to a cup of Orange Pekoe tea. (It always had to be the brand Red Rose.) And since she had a serious sweet tooth, she couldn’t resist having one of the cookies herself!
By the time I got home from school, my mom would’ve finished licking all the icing from the bowl. So funny, since she was an adult. But apparently, this was a recipe my nonna hadn’t created when she was a girl. It was invented for her grandchildren. So now, according to my mom, she was making up for lost time.

But it was okay that I never got the bowl of icing because my nonna would smile and offer me a cookie. That made everything right with the world.
She made these cookies as a way to show she was thinking about us throughout the day, even while we were away.
Now, every time I make this recipe, I’m reminded of how much my nonna poured love into the food she made us. And these chocolatey, sweet cookies still make me think happily about her to this day.
Nonna Rita’s Chocolate Cookies
Makes about 30 cookies
Ingredients
For the cookies:
4 eggs
½ cup sugar
½ cup honey
½ cup sunflower oil
3 ½ cups all-purpose flour
1 teaspoon baking soda
2 teaspoons baking powder
2 tablespoons cocoa powder
1 teaspoon cinnamon
For the icing:
2 ⅓ cups confectioner’s sugar
1 cup cocoa powder
¼ cup water
Method
To make the cookies:
Preheat the oven to 300°F. Line a large baking tray with parchment paper.
Beat eggs in a large bowl for 20 seconds. Add sugar to the eggs while beating until well combined.
Add honey and oil and continue beating.
Next, dump in half the flour and beat until smooth. Add baking soda, baking powder, cocoa powder, and cinnamon. Mix until combined and no longer lumpy.
Add in the remaining flour and stir with a wooden spoon until just combined. Use your hands to mix until smooth.
Use a 1-inch cookie dough scoop to form balls of dough. Roll the dough balls with your hands until they form smooth spheres and add them to a parchment-lined baking tray.
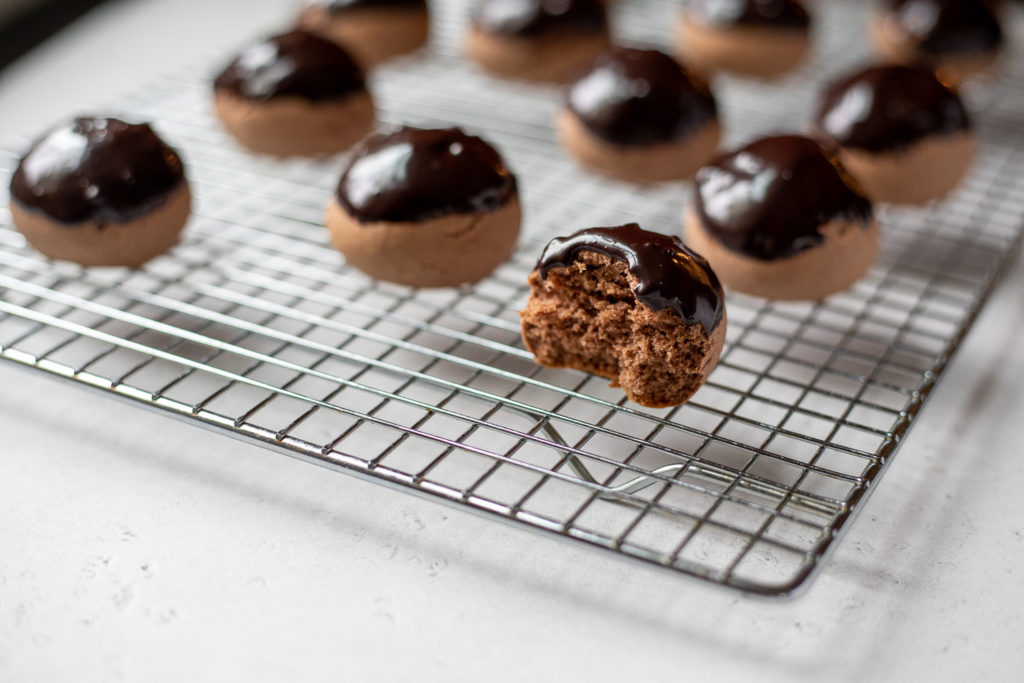
Put the cookies in the oven for a maximum of 20 minutes, so they stay soft (they may only need 15 minutes or so). The cookies will likely crack along the top.
Allow cookies to cool before making the icing.
To make the icing:
Add the confectioner’s sugar, cocoa powder, and water to a bowl. Whisk until smooth and there are no longer any clumps. Icing should be thick, but spreadable. Add more water if needed to make icing looser.
Dip the tops of each cookie into the icing or use a spoon to spread a thick layer of icing smoothly to the top.
Enjoy!
These cookies will probably get eaten in the first few days. But if you somehow manage to control yourself, they’ll stay nice and soft when stored in an airtight container for up to two weeks. (I think — I’ve never made it that long myself!)


Emma Givens is a copywriter, content marketer, and writing coach for entrepreneurs, and the proud granddaughter of 2 Calabrese immigrants who came to Toronto in the 1950s. In her series Calabrese Cooking with Nonna, she reconnects with her grandmother who passed in 2020 by recreating her homemade culinary classics — and reveals a few family stories along the way.

Post a Comment
You must be logged in to post a comment.